Meat grinder requires special care. After every use it is important to wash the grinder appropriately regardless of whether it is electrically powered or manual.
Knowing how to clean a meat grinder properly is critical because grinders are the most use equipment of all time in the kitchen.
The washing of a meat grinder whether it is electric or manual both grinder has the same procedures. Therefore, without delay, let us look at the 7 steps of How to Clean a meat grinder. Also, I will be providing you 3 more tips to keep your meat grinder in good shape at the end of this blog post.
7 steps of How to Clean a Meat Grinder:
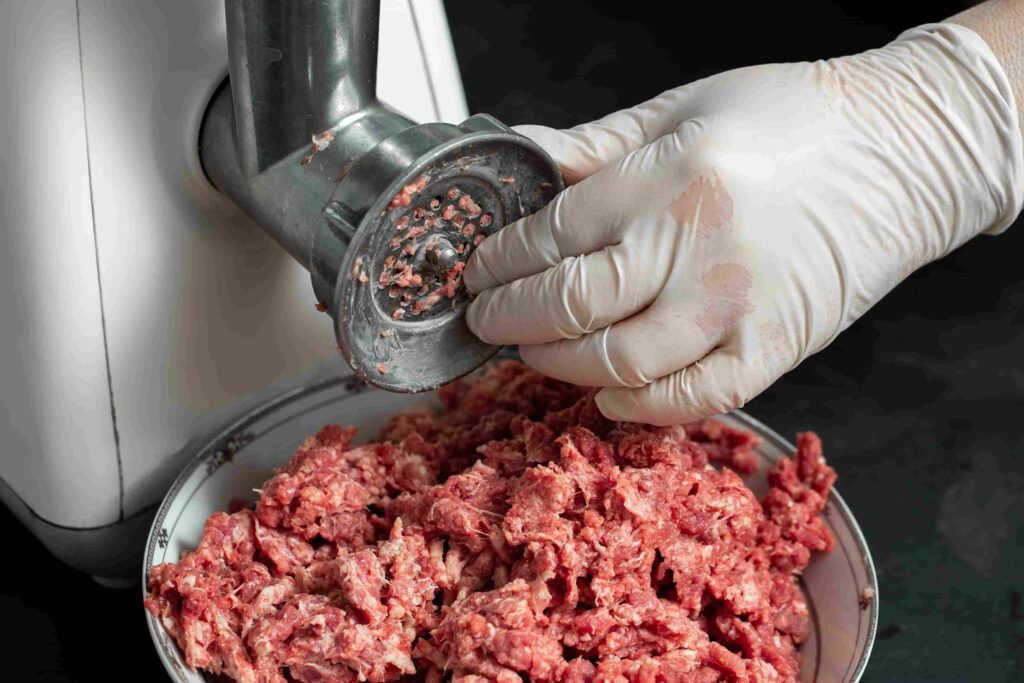
Step 1 – Clean the stuck meat chunks out of the grinder:
If the meat gets stuck in the grinder, you will need to clean it off immediately. You can do this by using a knife, fork, or pointed kitchen appliance. Be sure to clean off all of the meat so that it does not rot and cause a health hazard.
Step 2 – Grind the bread through grinder:

Now, grab 2 or 3 slices of bread and put them into the grinder, and grind them just like you ground the meat. This will help you to get rid of all the grease and oil left by the meat you minced. Before disassembling the grinder make sure you clean the all stuck meat pieces and the grease/oil left by the minced meat.
Step 3 – Disassemble the grinder:

As stated above electric and manual both grinders can be washed in the same way, but you need to look for a plug if it is electric, unplug your grinder and break down its components. Follow the steps to disassemble the grinder properly:
- First, remove the meat tray, feed tube, and hopper.
- Remove the internal screw, blade, and cutting plates.
- Unscrew the metal cover through which meat comes out.
- Do wash all the components properly because this will keep the grinders components saved from rust and bacteria.
Step 4 – Put the parts for long hours inside soap water:

Now fill a bucket or large bowl with lukewarm water and put the dish detergent in the bowl or bucket. Then put all the parts you have detached from the grinder (tray, feed tube, hopper, internal screw, blade, cutting plates).
Let the parts be in the water for 15-20 minutes so that the warm water will remove all the oil, grease, and meat. This process will help you to remove the stuck pieces of meat from which the discoloration on the metal components will not take place.
Step 5 – Clean thoroughly these sections of the grinder:

Now, in the fifth step take a sponge to scrub the metal parts. Scrub the metal parts lightly carefully because at this point you are dealing with sharp blades, cutters, plates, and so forth. While scrubbing use the sponge in the right way, use the sponge slowly so that no piece of the meat whether it is oil or grease left behind, and be careful while scrubbing the sharp blades and plates so you do not hurt yourself.
While you are scrubbing the metal parts make sure of the pressure you are applying to it. More pressure or harsh scrubbing is the reason that metal parts start losing their coating.
Step 6 – Use a damp cloth to rinse and dry:

After washing and scrubbing rinse everything again with lukewarm water and dry each and every component with a cloth. With light hands rinse every part because the harder the rinsing the more chances of losing coating.
Step 7 – Air Dry

Last but not the least, let’s dig into the last section of this blog: make sure to air dry the all parts, after rinsing the components you must air dry the metal parts so that no stain can stay on the parts plus, the life of the grinder and it parts increases.
Reassembling the meat grinder
When you have cleaned up a meat grinder, it is possible to start grinding meat; however, before you begin grinding meat, you must take it apart. Therefore, ensure that you go through the directions keenly before commencing on it because there are various pieces that need to be assembled.
To begin, place the hopper on top of the motor unit. Make sure that it is properly seated and secure with the screws provided.
Next, place the cutting wheel on top of the hopper and fit it snugly into place. Be sure to tighten the screws if necessary.
Next, install the auger onto the shaft of the motor unit and secure it with the screws provided. Be sure to orient it correctly according to the diagram included with your machine. Finally, connect the power cord to your outlet and plug in your machine and by this you can put a meat grinder together.
Read more on how to assemble electric meat grinder.
Now coming towards the bonus tips that would help you to keep your grinder in perfect shape.
3 Tips to keep your meat grinder in perfect shape:
Once you clean a meat grinder, here are the additional tips that would extend the life of your grinder. So, the 3 tips are mentioned below:
1st tip – Oil the metal parts:
The purpose of oiling the metal parts of a grinder is to prevent rust. The metal parts of the grinder can become corroded over time, which can negatively impact the performance of the grinder and your meat won’t be of that great taste. Applying meat grinder oil to the parts can help to protect them from corrosion and keep the grinder functioning properly and this is a part of how to clean a meat grinder.
2nd tip – Grind cold meat:
Warm meat can create a mess while grinding it. On the contrary, cold meat can be clean-up and easier for the grinder to grind the meat. The main benefit of grinding cold meat is that it allows the meat to be more easily cooked and digested. Additionally, it can also help to preserve the flavor and texture of the meat.
If you are grinding the same meat again and again or small pieces of meat I would recommend you to fill a large bowl with ice then put a second bowl inside the grinder and grind the meat into that in this case you can mince the meat multiple times, although the taste of the meat will remain same.
3rd tip – Keep the blades sharp:
When you see your machine is not grinding the meat properly like it is not cutting down the meat into small pieces do get to know this is a green signal for you to sharpening grinder blades or to replace the blades.
A dull blade can be a mess provider therefore, it is important to keep the grinder blades sharp in order to achieve a consistent grind and prevent the formation of clumps. Over time, will evidently grow to be dull and could want to be replaced or sharpened. Sharpening the blades is a relatively straightforward process, but it is important to do it carefully to avoid damaging the blades.
For sharpening meat grinder blades read our guide on how to sharpen meat grinder blades.
And the long as you keep your grinder and its parts well maintained the life of your grinder can be extended.
Maintaining the meat grinder
Ensure that you wash it well each time you use it or if you cannot take the extra effort of cleaning it after every use then try your best to clean it twice per week. The next step involves pulling out the blade that is associated with the meat grinder cleaning.
Thereafter, you should wash them thoroughly using hot soapy water. Ensure that you clean the blade properly, removing every morsel that may have gotten stuck in there. Finally, everything should be dry before you put the grinder back together. The part “7 steps of How to Clean a Meat Grinder” provides details about cleaning a meat grinder.
Final figure:
In conclusion, following these 7 easy steps of how to clean a meat grinder will ensure that your meat grinder is clean and ready to use. Taking the time to clean a meat grinder will pay off in the long run, by extending the life of your appliance and ensuring that your food is safe to eat.
I hope that these 7 steps will be helpful for you in cleaning meat grinder. So, keep your grinder clean and make sure not to cut yourself while washing the blades. Also, do keep in mind that sharpened blades can also put an effort to extend the life of your grinder. If you want to know more about how to sharpen the blades, clicking below it will take you to the page about sharping blades.
For further information on cleaning the meat grinder, read our other guide on how to clean kitchenaid meat grinder.
Are you looking for a meat grinder? Our guide has the best meat grinders for home use.
FAQ’s:
Likewise, a few normal inquiries posed by individuals:
How would you clean an old meat grinder?
To start with, disassemble the meat grinder by eliminating the screw at the highest point of the processor. Then, eliminate the edge and the drill. Wash all pieces of the grinder with cleanser and water. Make certain to dry all parts totally prior to reassembling the meat grinder. To clean within the processor, utilize a sharply directed utensil to eliminate any buildup. Like this, you can clean an old meat grinder.
How would you keep the meat grinder from clogging?
You can keep your meat grinder from clogging by guaranteeing that the grinder is appropriately cleaned after each utilization. In the event that there is any development on the edges or on some other pieces of the grinder, it ought to be taken out. Also, it is critical to ensure that the meat being ground is surprisingly straightforward or greasy, as this can cause obstruction. To keep away from this, eliminating any abundance of fat from the meat prior to grinding is ideal.
How would you deep clean a meat grinder?
To profoundly clean a meat grinder, it is vital to separately first disassemble the grinder and afterward clean each piece. To clean the crushing chamber, utilize a brush to eliminate any coffee beans or other debris. The blade edges can be cleaned with a damp cloth. The beyond the grinder can be cleaned down with a damp cloth too.
How would you get rust out of an old meat grinder?
The most ideal way to remove rust from an old meat grinder is to initially absorb the grinder in a solution of water and white vinegar. Subsequent to drenching for a few hours, utilize a brush to clean the rust away. On the off chance that the rust is especially difficult, you might have to repeat the cleaning process a couple of times. When the rust has been taken out, wash the processor well with water and dry it completely prior to utilizing it.